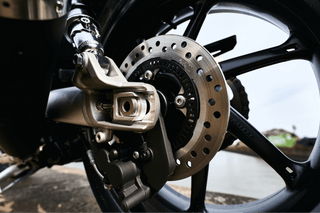
This tutorial shows how to install a Spiegler stainless steel braided brake line on a motorcycle.
Transcript
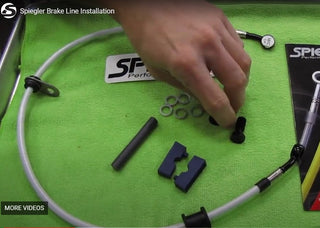
brake components are vehicle safety related items and should be installed by a certified motorcycle technician if you are not a certified motorcycle technician stop here and contact your local motorcycle service shop in this video we will show you how to install your new stainless steel braided brake line from spiegler before getting started please inspect the contents of your kit to ensure all necessary components have been included with your order inspect the brake liner lines to ensure that it is similar dimensions to the oem line it is replacing note that each speaker line should have a sticker indicating the position on the motorcycle banjo bolts if ordered compare the thread pitch should have your crush washers blue blocks and also plastic rod please be careful as brake fluid is extremely corrosive to paint and other surfaces we highly recommend that if you spill any brake fluid that it be cleaned up immediately we have placed towels around the motorcycle in various locations to help protect the finish in case of any accidental spillage start by locating the master cylinder fitting and feeding it up to the master cylinder following your desired routing the orientation of the fitting should be similar to what was on the oem line place one crush washer on the banjo bolt insert the banjo bolt through the banjo ring fitting place another crush washer on the banjo bolt you should now have a new crush washer on either side of the ring fitting and can thread the banjo bolt into the master cylinder only finger tight to start on this particular line we will install the top tab locator it is recommended that you use loctite to keep the bolt from vibrating loose once the tab locator is installed you may proceed to the caliper as you can see our fitting does not line up correctly to the caliper and will need to be rotated to rotate the banjo fitting using the enclosed vise blocks place blocks on the stainless steel crimp sleeve and hold the brake line in a vise or in this instance a set of nippex smooth jaw pliers tighten the blocks until they start to discolor and then rotate the fitting using the supplied plastic rod until the desired position is reached you may not get it right the first time and you will need to repeat the process a handy tip is to set the ridges of the blocks into the indentations of the crimp sleeve also do not rotate the fitting more than one full rotation if needed you may rotate the fitting back in the opposite direction once banjo fitting alignment is achieved double check the line routing and install new crush washers as we did on the top and install the bolt into the caliper and any remaining line grommets as you can see we have utilized the oem metal bracket to hold the rubber grommet in position in some instances the rubber grommet may need to be relocated to better optimize brake line position torque the line to your vehicle manufacturer's specifications but do not exceed a maximum torque of 14.75 foot-pounds or 20 newton meters check to ensure that the brake line is properly installed by turning the handlebars locked bouncing the bike up and down and topping out the suspension brake components are vehicle safety related items and should be installed by a certified motorcycle technician if you are not a certified motorcycle technician stop here and contact your local motorcycle service shop in this video we will show you how to install your new stainless steel braided brake line from spiegler before getting started please inspect the contents of your kit to ensure all necessary components have been included with your order inspect the brake liner lines to ensure that it is similar dimensions to the oem line it is replacing note that each speaker line should have a sticker indicating the position on the motorcycle banjo bolts if ordered compare the thread pitch should have your crush washers blue blocks and also plastic rod please be careful as brake fluid is extremely corrosive to paint and other surfaces we highly recommend that if you spill any brake fluid that it be cleaned up immediately we have placed towels around the motorcycle in various locations to help protect the finish in case of any accidental spillage start by locating the master cylinder fitting and feeding it up to the master cylinder following your desired routing the orientation of the fitting should be similar to what was on the oem line place one crush washer on the banjo bolt insert the banjo bolt through the banjo ring fitting place another crush washer on the banjo bolt you should now have a new crush washer on either side of the ring fitting and can thread the banjo bolt into the master cylinder only finger tight to start on this particular line we will install the top tab locator it is recommended that you use loctite to keep the bolt from vibrating loose once the tab locator is installed you may proceed to the caliper as you can see our fitting does not line up correctly to the caliper and will need to be rotated to rotate the banjo fitting using the enclosed vise blocks place blocks on the stainless steel crimp sleeve and hold the brake line in a vise or in this instance a set of nippex smooth jaw pliers tighten the blocks until they start to discolor and then rotate the fitting using the supplied plastic rod until the desired position is reached you may not get it right the first time and you will need to repeat the process a handy tip is to set the ridges of the blocks into the indentations of the crimp sleeve also do not rotate the fitting more than one full rotation if needed you may rotate the fitting back in the opposite direction once banjo fitting alignment is achieved double check the line routing and install new crush washers as we did on the top and install the bolt into the caliper and any remaining line grommets as you can see we have utilized the oem metal bracket to hold the rubber grommet in position in some instances the rubber grommet may need to be relocated to better optimize brake line position torque the line to your vehicle manufacturer's specifications but do not exceed a maximum torque of 14.75 foot-pounds or 20 newton meters check to ensure that the brake line is properly installed by turning the handlebars locked bouncing the bike up and down and topping out the suspension